[lwptoc min=”2″ depth=”6″ hierarchical=”1″ numeration=”none” skipHeadingLevel=”h1,h4,h5,h6″]
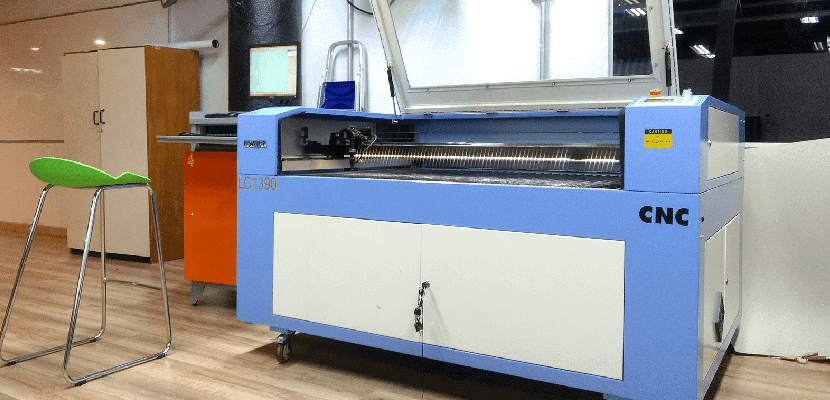
Neatly-designed chairs, intricate patterns on tables, unique carvings on beds, spiral staircases spanning 3 stories, bookcases with the Swedish aesthetic – all of these look visually perfect, but have you ever wondered just how manufacturers design and build such beautiful masterpieces? How do they concept designs that make customers fall in love at first sight? The behind-the-scenes CNC furniture process starts with well-thought designs and advanced tools. CNC furniture designers use software applications that not only allow them to visualize their ideas but also rotate the design and view it from different angles. This allows them to inspect the furniture from all angles to cut the wood and give shape to their final product with precision.
If you want to design and create furniture using your own home CNC machine like the pros, this list of resources, including designs, software, open source plans, and content libraries is just the thing to make these kinds of projects a reality.
CNC Furniture Software
With dozens of software applications claiming that they would allow you to design some of the most beautiful CNC furniture and fixtures, which one should you use? Which one gives you the flexibility to design foldable CNC furniture or ones with intricate pieces that only a few can create? Here are a few software applications that have been tried and tested by some of the leading furniture designers in the world.
CAD Pro
CAD Pro is a widely popular drafting software application that allows you to visualize your design, document it, and develop a prototype so that the manufacturing team can cut wood accordingly. This application comes with a host of drafting software features that you can make the most of to design the blueprints of your furniture and fixtures.
Furniture designers often praise its unique features like auto shape tools, networking support, draw, edit, and snap and dimension. CAD Pro has become one of the leading drafting software applications that help designers and architects to grow their businesses.
This application not only lets you design an entire collection of furniture and fixtures but also replacement doors, raised panels, face frames, dovetail drawers, and cabinet boxes.
Best features:
• It comes with advanced sketching and editing tools, allowing you to sketch and edit your idea within a few minutes. You will find groups of points on a blank sheet on this application. Just rearrange these points according to your idea to give shape to the design you have in mind. It saves a lot of time and effort because you don’t need to use the designing pen or rubber to make the furniture look perfect.
In addition to the quick-sketch feature, the application also lets you add fillets and chamfers to your designs using the fillet & chamfer tool.
• The dimension tools, together with the precise snap tools, allow you to create precise designs. While designing, you will notice that these features automatically align themselves according to the shape you want. They can work as object centers, intersections, parallels, or perpendiculars, depending on the shape of the furniture.
• The architectural tools allow you to create folding furniture and minimalistic furniture, something that modern-day customers want to use in their homes. Its architectural smart symbols allow you to get an idea of where the furniture would suit you best, such as under the windows, beside the wardrobe, or at the center of the living room.
Wood Designer
As the name suggests, Wood Designer is specifically for professional CNC furniture designers. It gives you the perfect blend of performance, price, and quality. Most importantly, this application is five times cheaper than any other pro-level software application. From giving shape to the design to viewing the practicality of the furniture on a 3D presentation, this software allows you to do everything to make the furniture look flawless. This application increases your productivity by making the design process easier so that you can develop more designs within a short period.
 Best features:
• Drawing a collection of furniture and fixtures can take days if you sketch them using a pencil and paper. Instead, you can use Wood Designer as it generates instant tools that allow you to shape furniture that will work on a CNC machine.
• Wood Designer comes with a 3D feature that allows you to view your design from all possible angles. With CNC machines, you need to get your measurements absolutely inch-perfect. Plus, the high-end detailing of furniture and fixtures tests your skills. And Wood Designer will help showcase your skills in style. The 3D feature is very useful for testing the practicality of your idea. Will the table work if the user folds it sideways? How much space does it save? You can get all these answers using the 3D platform.
• You can eliminate various production errors by editing and updating the design in real time. Unless the manufacturer produces a prototype, it is difficult to determine if the design will work for bulk production or not. If you notice any challenges during the production of the prototype, you can edit the design accordingly.
SketchUp
SketchUp is one of the best 3D modeling and documentation software applications suited for woodworkers. It allows you to make changes to your design, view the design on a 3D platform, and build mockups so that you can show your clients what the collection of furniture will look like once it’s complete.
Best features:
• Traditionally, furniture designers used 2D plans to view their ideas. This was a time-consuming job because the designer had to sketch the same furniture from different angles to give an idea of how it will look like. But SketchUp works differently. With its 3D modeling platform, you don’t need to sketch from different angles. The application will allow you to drag and change the views, thanks to its 3D feature.
• The perspective view of the furniture in the 3D platform helps you understand the practicality of the design. You can use the same model to develop scaled shop drawings with various dimensions using SketchUp. The isometric view in this application allows you to view the furniture from the top, bottom, front, back, and left and right sides. You can add notes, labels, or dimensions if you want to edit the design later.
SketchList 3D
For any Mac user out there, SketchList 3D provides a complete suite of 3D design and modeling tools. With realistic textures, detailed measurements, and the ability to produce complete plans and layouts, SketchList gives everything needed for DIY amateurs and pros alike.
Best features:
– Cabinet Wizard – Time is often pressing, and even pros may not have the luxury of designing new pieces entirely from scratch. The Cabinet Wizard fixes all that. Simply start with certain presets and templates, and then adjust dimensions, board sizes, material thickness, and so on as needed.
– Customizable software – SketchList comes with a number of options. In addition to the Cabinet Wizard, there are optional furniture design and kitchen design suites. Users can adjust the software as needed, adding tools as they go.
Best CNC Furniture Design Websites
Now that you know about the top-rated applications that can help you design custom CNC furniture patterns and fixtures, you should also check out a few sites that offer incredible furniture designs. You can draw inspiration from their designs and develop a collection of furniture that your clients will love. It is not easy to come up with unique designs every day. And taking inspiration from others is not cheating. So, don’t think that you are stealing someone’s idea as long as you put your own creativity into it
Thingiverse
Thingiverse is widely popular for its 3D printable objects, but it also has a furniture design section for CNC machines. Consisting primarily of dining tables, corner tables, coffee tables, and chairs, this site helps you design some basic furniture and fixtures using the software applications above. If you are a novice at furniture design, then Thingiverse should be your go-to site for design inspiration. You can download the 3D designs of different types of furniture and fixtures and follow the sketching instructions. It is the ideal site for beginners to get their feet wet in furniture design.
Etsy
Etsy is a comprehensive and reliable source of furniture designs. Their designs range from furniture accessories to traditional benches, chairs, tables, and fit-together lamps. You will find thousands of designs on Etsy that have already been developed by many manufacturers. But you can always add your own twists to their designs to make them look unique. All the files are available in DXF format, making it easier to open them in the designing applications above. Most importantly, all the plans are laser-ready. This means you can create a prototype using a CNC machine if you don’t want to edit the readymade design.
However, the subscription plans on Etsy may seem to be expensive as they provide a guarantee and assistance from the sellers. You can start with a reasonable plan before moving to a long-term plan later.
AliExpress
It is challenging to develop period furniture because it includes a combination of ornamentations. These pieces of furniture contain designs of flowers, fruits, and carved legs to make them look unique. CNC carvers toil hard to achieve the highest level of accuracy in their designs, but it takes days to reach that goal.
AliExpress makes this process easier. With period furniture and fixtures, it is about finding the appropriate 3D model for the respective ornaments. Find the right model, and you can program your 3D printer or CNC router to create period-appropriate ornaments.
AliExpress contains more than 600 3D models so you can identify the right model for different designs. From headboards and sofas to carved moldings and legs, this site has almost every 3D model you can think of. AliExpress is ideal for designers working on a shoestring budget as most of the designs are available for a couple of bucks.
Yeggi
Yeggi is a hub for CNC-carved furniture and fixtures. With more than 2000 unique designs of table corners, chair handles, table stands, and bed ends, this site will never disappoint if you want inspiration for out-of-the-box ideas. Sometimes you may go through a rough patch where you can’t think of ideas to make a piece of furniture look funky. You can combine the ideas from Yeggi and Etsy or any other website to come up with new designs. The more designs you see, the more ideas run through your brain. Make the most of these designs to showcase your design skills.
Makezine
Open design CNC furniture is now selling like hotcakes. With construction companies building smaller apartments than before, families are now turning towards open design furniture and fixtures to save a significant amount of space so that they have more room to move around in their houses. Makezine consists of some open designs that work on CNC machines without facing any challenges.
Supported by eight top-rated furniture makers, this website will give you excellent ideas on how to design modular shelves, foldable tables that convert into sitting units, bookshelves that turn into beds, and many such designs. The ideas will literally make you want to fire up your computer and start sketching the fixture using the software above. Once you’ve got your design, it’s off to your CNC router or laser cutter to start production.
3axis.co
This is a specialist resource when it comes to furniture plans for CNC machines. From cut and assemble flat-pack pieces to elaborate carvings, you will find tons of designs on 3axis.co, all of them for free. But although there are hundreds of designs available, it is challenging to find downloadable information. You may need to scroll a lot as every page is full of sponsored ads. The site also doesn’t contain any search bars, making it time-consuming for viewers to find the information they need. If you can overcome these challenges, 3axis.co will provide you with never-seen-before designs.
DXFdownloads
DXFdownloads provides furniture plans both in STL and DXF format, depending on whether you want to carve or cut. There are two ways to use this website: either spend money to buy points to download a furniture-design plan. Or, you can submit your own sketch to earn points that can help you download design plans later. This site is also ideal for starters who want to learn the basics of carving furniture parts using CNC machines. The designs are simple enough for beginners to grasp and later implement on their design sheet.

Opendesk
Opendesk not only offers various furniture designs but also provides a list of makers who can custom-build the furniture you had designed. This site usually follows a European style of design that looks elegant and slick at the same time. Although there are only 30 designs on the website, you can get inspiration from them to develop various pieces of furniture that will reflect your imagination and creativity.
While not many machinists’ first choice when designing furniture, Pinterest contains some great ideas for your next CNC furniture project. There are links to open source CNC furniture plans and plenty of beautiful images to inspire your project.
Inventables
Inventables is yet another site offering plans for everything from a unique otter chair design to a parametric circle cubby. They have pages of downloadable CNC furniture plans and home decor ideas, and most of them are appropriate for a medium-sized tabletop CNC router.
Obrary
Obrary has designs for laser cutting or CNC routers. Their collection includes modern furniture such as an infinity chair and other CNC projects like a Barcelona Warre Beehive. The free downloads include either DXF or STL files and supporting documentation.
CNC Furniture Plans and Designs
Looking for a curated list of CNC furniture for inspiration? Here are a few you can access today to start your next project, including some free open source designs.
The Edie Set by David & Joni Steiner
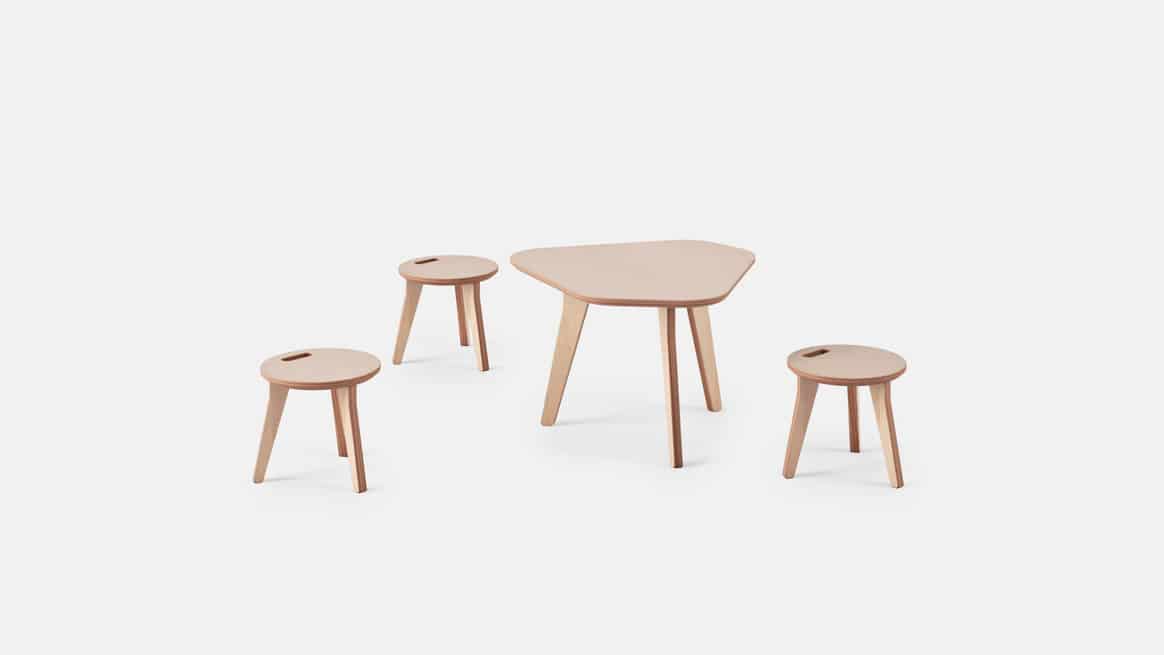
The Edie Set is perfect for young children to eat or play around and was designed to be friendly and approachable, simple in form and easy to make. The table and stools also double up as small coffee or side tables.
The Italic Shelf by Ronen Kadushin
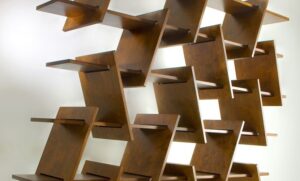
The Italic Shelf is easy to fabricate, easy to assemble knock down shelving system. It consists of only 2 parts, a 24 or 18-mm plywood shelf and spacer, that can be assembled in many ways and configurations.
Its name “Italic” is derived from the italic typefaces that slightly slant. It has endless arrangement possibilities and has a unique sculptural presence that comes from the direction of the spacers and the fact that the shelves are not aligned.
The shelf is very stable and strong as each part is locked by its own position and weight in a structure I developed and named “Controlled Collapse”. Basically, when the shelf is built high, it doesn’t lose its strength or stability. It may be plywood furniture, but it’s built to stand up to heavy shelf loads.
AtFAB Walking Chest of Drawers
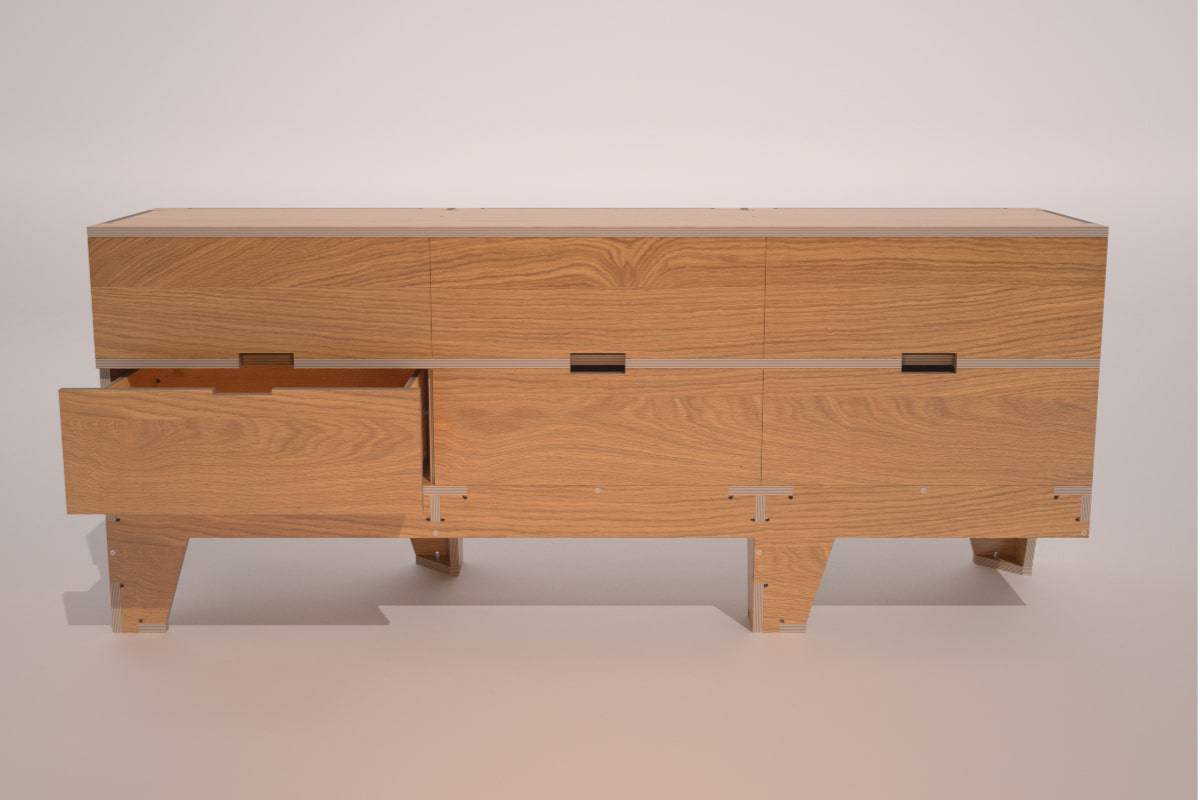
This low chest is suited for clothing storage. The Walking Chest is one of AtFAB’s next generation of case goods that rely on CNC techniques to fabricate integral drawers and doors, without the need for hardware.
The Alex Chair
The Alex Chair is made from 1/2″ birch plywood. It uses a living hinge design, so the seat and back are a single piece of wood. The chair snaps together by hand. It uses no screws or nails. It can also be taken apart again.
The Layer Chair
Do you want to create formal chairs for your home that doesn’t feel so stuffy? Jens Dyvik created the Layer Chair, and through open design, it has morphed into a wide range of different chairs, from plywood chairs to elegant hardwood models, that all stem from the same basic structure. Depending on your specific needs, you can customize this chair to make it your own.
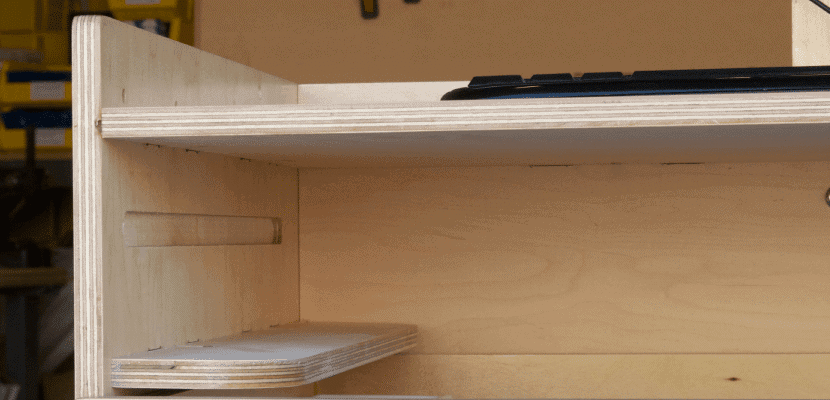
Ultimate CNC Cut Height Adjustable Desk
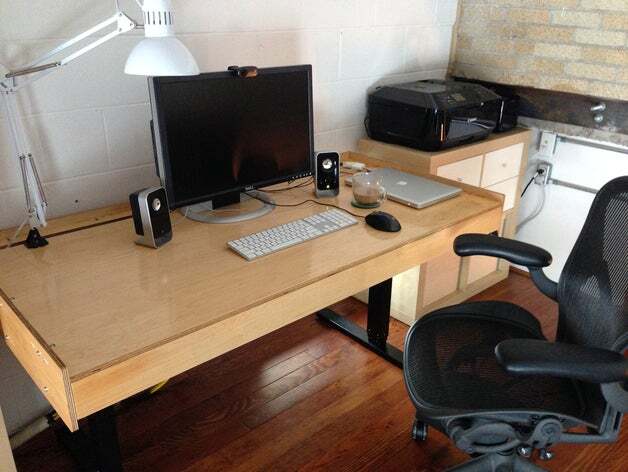
figured this out and came up with a way to customize his own sit/stand desk that is unlike most of the adjustable desks you’ve seen.
Modern Dining Chair
The perfect gift for that perfect someone: a 1:6 scale miniature modern dining chair. Laser cut files SVG DXF CDR will instantly download. Material thickness is 18mm, but the seller will scale the file if you prefer another thickness.
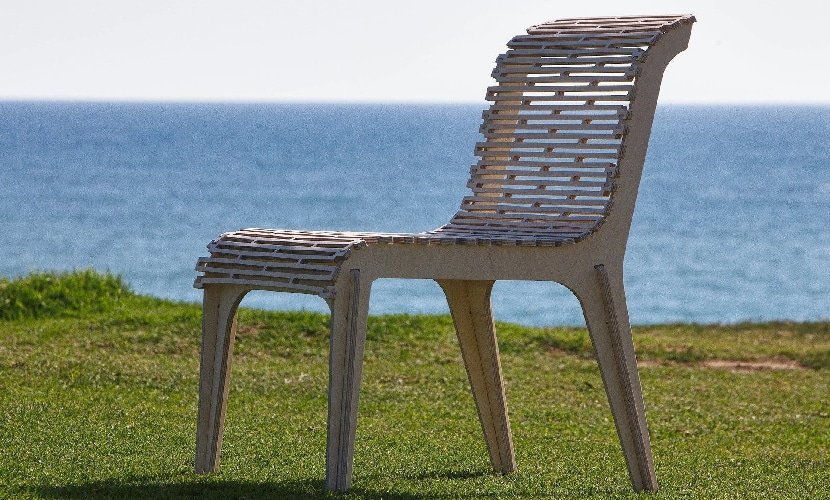
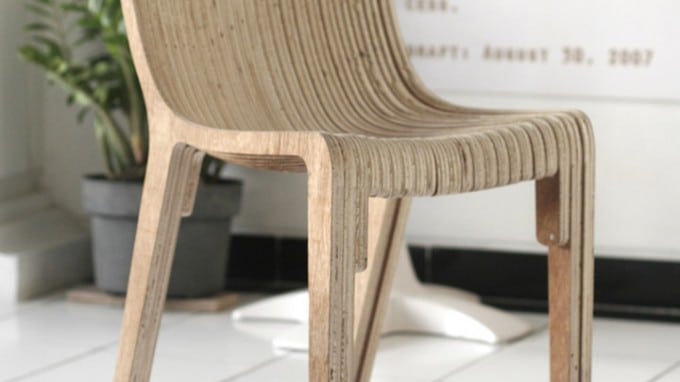
Parametric CNC Chair
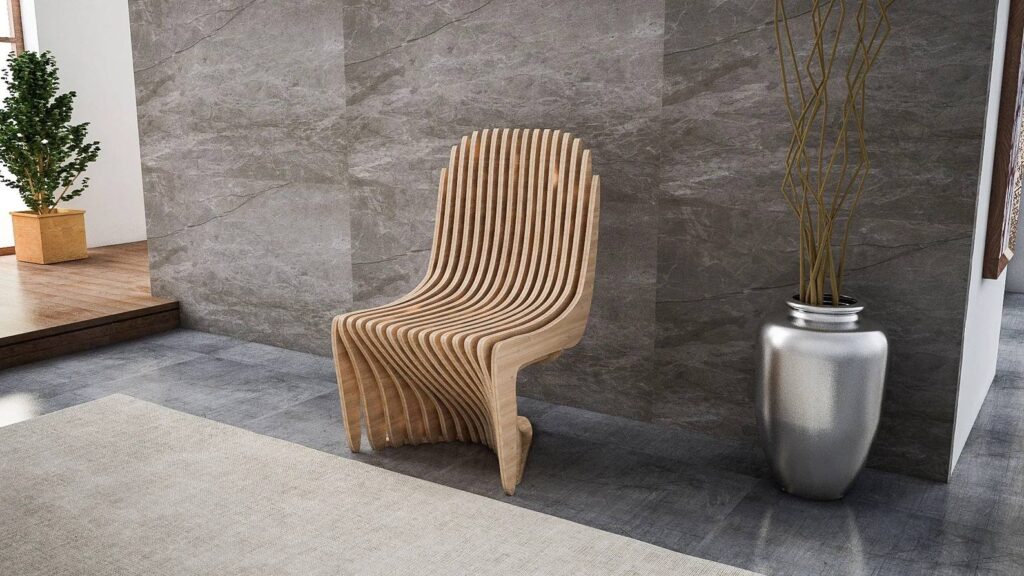
This Parametric Chair Design will brighten the workspace in your home office. Includes digital download DXF files vector template. The material is .7” or 18mm plywood and has dimensions of 23.1” x 22” x 36.5” (L x W x H). All the parts and spacers are included in the design.
CNC Table Plan
You will receive the CNC table plan in DXF file format, vector plans only, to be cut on your CNC Router. The table is 24” long x 14” high x 4” wide and works with plywood, wood, MDF, and aluminum. You can scale it as needed.
Rather than pay for access to libraries of CNC furniture plans, use the open source options above to plan out your next CNC furniture project.
Conclusion
With so many websites ready to provide design information on CNC furniture and fixtures, you shouldn’t feel lost if you can’t think of new ideas. Plus, the software applications will help you develop your own creations and make a name as a professional furniture designer.
Using the resources above not only helps you create beautiful furniture, it significantly lowers the price of such projects. After all, if you’ve invested in a CNC machine, having the plans and resources makes your next project a breeze.
CNC Masters also has you covered if you want to take an open source design and make it your own. We offer desktop milling machines and lathes that are ideal for these projects and many more. Contact us at 626-962-9300 to learn more today.


